Why do we need to do this on three
pages???
Well, i think this is long, and involved.
Ya gonna need a break! LOL Feedback is always
welcome!
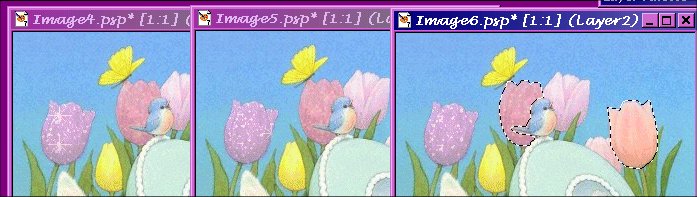
Remember we minimized those images in PSP?
1. Bring them up, side by side, so you are viewing
all of them
2. To each image, add a new rastar layer (Layers>New
Rastar Layer).
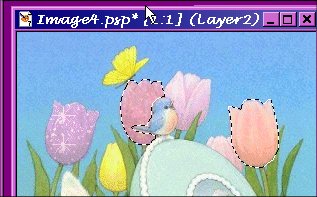
3. To each image= Selections>Load From Disk.
When the window pops up, find your selections folder and
click on the 1tulips.sel, then click open.
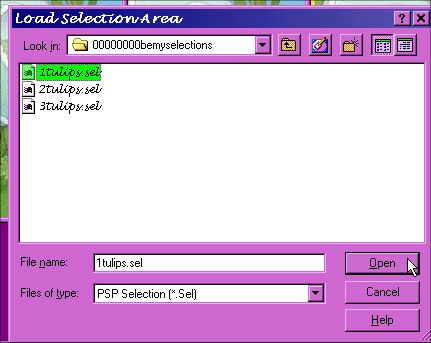
Notice in each image, the two tulips are selected.
kewl huh??
hmmm..... i think i forgot something.....not
exactly what you wanted to read is it? Well, it's
not that earth shattering..::giggles:: we just need our
glitter!!!
I am using two different ones this time:
 
Just like before, copy and paste each frame FROM
animation shop into PSP. Set your color pallet on
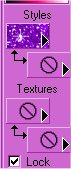
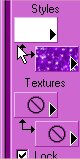
pattern:
Choose the first frame of your glitter.
Set the pattern options like this:
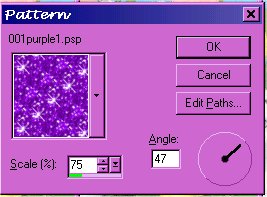
(cuz we don't want all the tulips glittering in the same
direction, do we?)
Click on the flood fill tool  . .
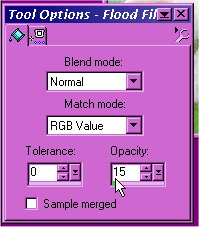
Using these settings:
Working with the first frame only.
Click in the first selected tulip to fill it:
Go to the second frame:
Change your pattern fill to the second frame of your
glitter, same settings.
Click on the inside of the same tulip in the second
image, that you did in the first frame to fill it.
Go to the third frame:
Change your pattern fill to the third frame of your
glitter, same settings.
Click on the inside of the same tulip in the third image,
that you did in the first two frames to fill it:
Have you noticed that the darker tulips sort of make it
dirty looking?
i am going to leave this one as is. BUT (oh no,
where is bemy gonna take us now..LOL)
We are going to lighten the other one before we add it's
glitter!
Do NOT de-select anything at this time.
File>Save ~~Do this to each image window!:)
Back to the first frame.
Change your color pallet like so:
Click that little double arrow so your pattern fill is on
the bottom and change the null to paint fill and choose
white as the color.
On all your image windows Layers>New Rastar Layer.
Choose your flood fill tool floodfilltool.jpg, same
settings.
on each image, click inside the second tulip 3 times.
I did three fills cuz i still wanted them lines to show a
bit.
(you can choose how many times you want to fill it, you
will see the details as you go:)

Go to Layers>Merge>Merge Visable Go to
Layers>New Raster Layer (on all images)
~~adding the glitter~~
leaving the pattern fill options the same as before.
your flood fill tool should still be selected.
Working with the first image now:
Change Your Pattern Fill to the first frame of your
glitter.
Click on the inside of the tulip selection that you
lightened, to flood fill.
Go to the second frame:
Change your pattern fill to the second frame of your
glitter, same settings.
Click on the inside of the same tulip in the second
image, that you did in the first frame to fill it.
Go to the third frame:
Change your pattern fill to the third frame of your
glitter, same settings.
Click on the inside of the same tulip in the third image,
that you did in the first two frames to fill it:

On all images:
Selections>Select None Layers>Merge>Merge All
Flatten File>Save
Break Time! LOL
Then on to
page 3!
Back to
Page 1
|