How To Glitter Your Fonts Tutorial
written by Bemymind©
January,2002
The most fascinating thing i ever saw, was
the glitter "Happy New Year" gifs
that i saw these past few weeks
Here is the example:
(not made by me, would love to know who did make it!)

Naturally the call went out to every corner of
the internet..."HOW DO I DO THAT?!"
Well, thanks to a wonderful friend,Ginger, she located
the websites that had the glitter gifs to share!
I can't thank her enough!
Then came the moment..... i had to figure out how to do that!
Here is the
How To Glitter Your Fonts Tutorial
©Bemymind
2002
For this tutorial you will need:
Paint Shop Pro (i use 7.2)
Animation Shop (comes with Paint Shop Pro)
Platthand Demo Font Click Here To Download Platthand Font File
Fairies Ding Font Click Here To Download Faerie Ding File
or font and ding of your choice.
Optional Eyecandy :for bevel effect: (i use 4.0)
And your choice of glitter!
Locate a glitter gif Aylana's:

When you get to the Glitter Website,
Be sure to right click over the gif you choose and save as a .gif,
if you click on the gif image, it sends you to an
unauthorized error page.
Click Here For Glitter!
and save to your harddrive.
This is the glitter i'll be using for this tutorial:

(right click and save to your harddrive as a .gif)
Let's do a little prep work first!
Make sure you install your fonts first!
Have Paint Shop Pro open and
Open Animation Shop
then open your glitter gif in Animation Shop.
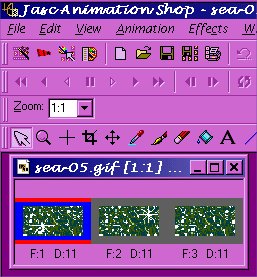
Notice that this particular one has 3 frames.
This is important, because you will flood fill
your font/ding three different times.
If you have a glitter with more frames, you will fill
your font/ding equal to that many frames.
The first frame usually is selected (red/blue lines around it)
as in the picture above.
Click the copy button  in animation shop. Bring PSP up in animation shop. Bring PSP up
and click the "paste as new" button in  PSP. PSP.
File>Save As
and name this
1glitter.psp
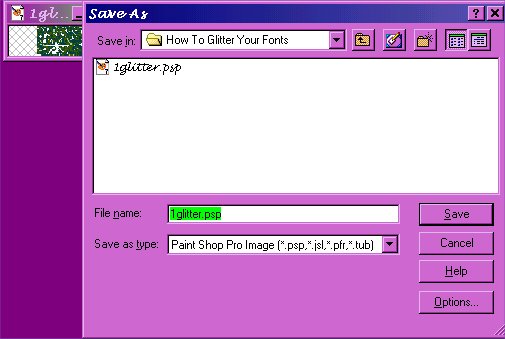
Go back to Animation Shop and click on frame 2 to select it.
Repeat the copy and paste and save steps
for each frame; being sure to name each frame in
order! 1...2...and 3.
Now i have all three saved as psps for my flood fill.
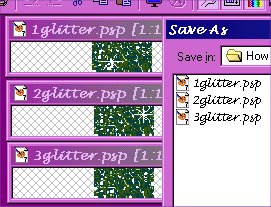
Now we are ready to begin working with our fonts.
Keep your glitter psp images open in Paint Shop Pro.
We will be using them as we go now:)
Open an image 400x400 transparent.
Select your text tool button  . .
. Click anywhere inside your image and choose the
Platthand Demo Font.
This is an awesome font! You may need a bigger
beginning image area to work in, depending on the
letter you choose:)
type in your text (note: it is the capitol letters that usually have
the very kewl effects to them)
Settings as below:
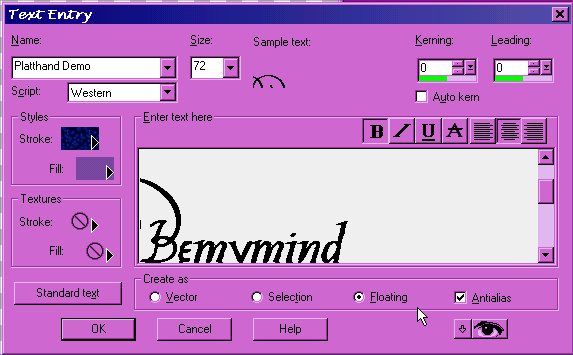
Don't worry about the fill colors at this point, cuz we are gonna change that:)
click ok. Leave the marching ants for now, and move the text
within your image box till you like what you see.
Next, go to Layers>New Raster Layer.
Click in the center of your image and choose the fairie ding, settings below;
(note: it is the capitol letters that have the images)
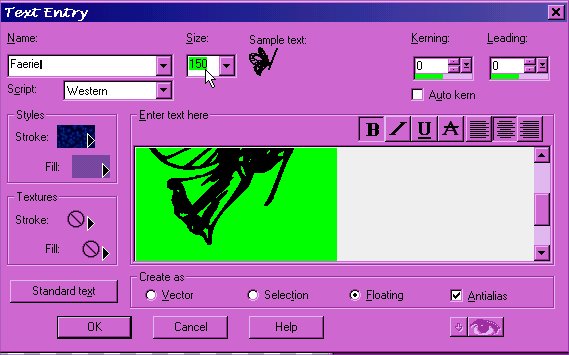
click ok, and leaving the marching ants for now, move to have it set
somewhere nice on your text.
Select>Select None
Layers>Merge>Merge Visable
Copy>Paste As New
This is to set your size of your animation.
With your new image selected, go to Image>Image Information
and make a note of how big your image is:
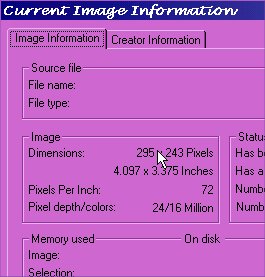
Now i want to make my final gif just a few pixels bigger.
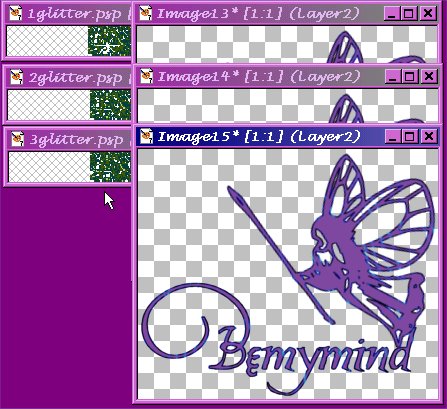
Open a New image
mine will be 300 x 250.
Open as many new images equal to the number of
flood fill images you have for your particular glitter gif.
i will have 3 total.
Copy your merged visable image and paste as a new layer
in each of your boxes.
(this is important to paste as a new layer for placement in your animation)

click on your flood fill tool  and then choose the foreground and then choose the foreground
color button to the right and click on the "pattern" fill.

next click on the pattern and choose your glitter1.psp as the fill.
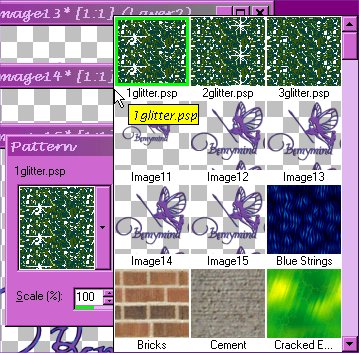
Now, select your first image to fill,.
then Select>Select All. Then Select>Float.
click anywhere in the floating selection and
your flood fill will happen:)
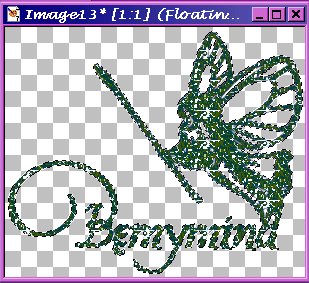
Here is where i add my bevel.
Layers>Merge>Merge Visable
Then Select>Select None
File>Save As
and save in psp format.
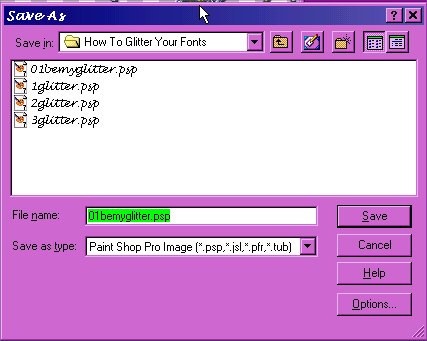
Now you can close that image.
Do the Same steps to the next images, making sure
you change your flood fill pattern each time!
Once you have all done, Go back to animation shop and launch
File>Animation Wizard.
I will list what each window should have selected instead of
adding even more images to this tutorial!
When Animation Wizard starts, there are a series of
windows asking you questions:
1. Select :Same size as first image, click Next
2. Select:Transparent, click Next
3. Select:Upper left corner of frame. Select:With the canvas color, click Next
4. Select:Yes, repeat the animation indefinately. Select 10 for the number, click Next
5. You get images for this one:)
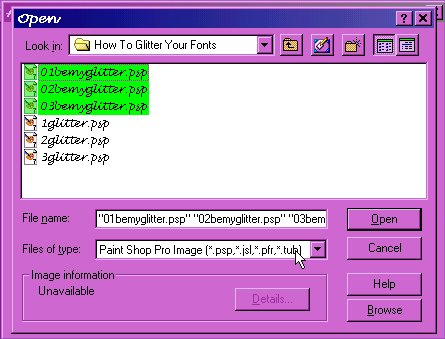
click the Add Images button:
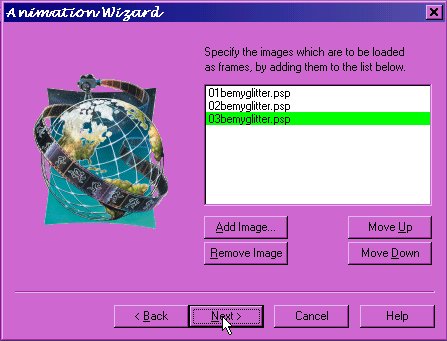
Then choose your images you wish to add:
i held down my Ctrl button and clicked once on each file that
i wanted to add. Click the Open button. Then click the Next button
when the original window (above) comes back.
6. Click the Finish Button. Animation Shop will build your animation.
Once it has finished you can click the "View Animation" button  to to
get a preview of your animation.
File>Save As.
MAKE SURE YOU SAVE AS A .GIF
Name your animation and click Save.
There will be yet ANOTHER series of windows...
let the defaults make this one, you can play with the settings on
all the other glitters that you do! :)
You will click the Next button 3 times and then the Finish button.
Ta Da!!
You did it!!
I know this is long, thanks so much for your time!
If you have any questions, i am always glad to help!!!
note: when inserting into e-mail, the background of your gif defaults to white.
But when you send it, the background of your gif will no longer be there. Test
e-mail yourself if you are not sure:)

©Bemymind@aol.com
January 2002 |

